
To explore image recognition testing in practice, an existing test case from a web application was recreated. It is about logging in, creating an author named “Hans” twice and checking if the new entries exist. Once with Eggplant and one more time with UI.Vision. At the end you can find the original test case from the Ruby on Rails framework for comparison.
The Keysight commercial product Eggplant Digital Automation Intelligence provides automated testing with image recognition. Recording makes it easy to create the test script in SenseTalk while collecting the images. For the example there were 10 single images. In the video you can see the recognized images outlined in orange.
Optical character recognition (OCR) is used for image-based testing. To read the number of the new entry, from line 15 the image I_interne_nr.png is searched first, the screen area to the right is calculated and then the number is read with OCR. This process can be seen in the video with green frames. The internal number of the new entry is printed in line 19 (blue entry in the log, left in the video) and then used in line 24 to enter the URL of the new entry.
The System Under Test (SUT) is controlled via RDP or VNC. Since the web application already uses a Selenium with Headless Chromium container in the test and development environment, the Chromium Docker container can be used as SUT right away.
| Used Image Name | Image |
|---|---|
| I_login.png |  |
| I_anmelden.png |  |
| I_autoren.png |  |
| I_autor_anlegen.png |  |
| I_speichern.png |  |
| I_author_success_hans.png |  |
| I_interne_nr.png |  |
| I_browser_URL.png |  |
| I_browser_URL_selected.png |  |
| I_logout.png |  |
 1# /authors/new with Eggpplant SenseTalk
 2## login
 3Click "I_login"
 4TypeText "first_user",Tab,"first_user_password"
 5Click "I_anmelden"
 6WaitFor 15, "I_login_success_first_user"
 7
 8## create 1st author "Hans"
 9Click "I_autoren"
10Click "I_autor_anlegen"
11TypeText "Hans"
12Click "I_speichern"
13WaitFor 15, "I_author_success_hans"
14## read number to the right of "Interne Nr."
15put the topright of ImageRectangle("I_interne_nr") into TopLeft
16put the bottom of ImageRectangle("I_interne_nr") into Bottom
17put the RemoteScreenSize's width into Right
18put ReadText([(TopLeft),[Right, Bottom]]) into Author_Id_1
19log "1st new autor id is " && Author_Id_1
20## check 1st author
21Click "I_autoren"
22Click "I_browser_URL"
23Click "I_browser_URL_selected"
24TypeText "/",Author_Id_1,Return
25WaitFor 15, "I_name_hans"
26
27## create 2nd author "Hans"
28Click "I_autoren"
29Click "I_autor_anlegen"
30TypeText "Hans"
31Click "I_speichern"
32WaitFor 15, "I_author_success_hans"
33## read number to the right of "Interne Nr."
34put ReadText([(TopLeft),[Right, Bottom]]) into Author_Id_2
35log "2nd new autor id is " && Author_Id_2
36## check 2nd author
37Click "I_autoren"
38Click "I_browser_URL"
39Click "I_browser_URL_selected"
40TypeText "/",Author_Id_2,Return
41WaitFor 15, "I_name_hans"
42
43# logout
44Click "I_logout"
UI.Vision RPA (Robotic Process Automation) with Selenium IDE for web application and desktop test automation was used in version 6.3.3. There is a Free plan, besides the commercial offers in Pricing. Much can be learned from the demo scripts installed with it. OCR works in the cloud with 100 scans daily in the free version.
UI.Vision RPA stores images with the DPI resolution in the file name to be able to convert the images for other screen resolutions. Specifying DPI (Dots Per Inch) to the images worked difficult. On Windows, the screen resolution had to be set to 100% and in Chrome, the page zoom had to be set to 100% for the images to be recognized. On a 5k Retina iMac, the images were captured at dpi_96, but recognition did not work. The screen is also 218 dpi. Then by trial and error with the find button and varying the conf (e.g. confidence @0.6) dpi_192 was found and all images are corrected to it. It is also helpful to check the captured screenshoots. If the DPI is wrong, the image section is shifted. All a little magic.
The image interne_number_dpi_96.png shows with a green frame the image to be searched and with a red frame the OCR area from which the created number is read.
The “Record” mode is used to record screen sequences. In addition to images, UI.Vision RPA also uses the Selenium IDE for this purpose. With the clickAndWait command, actions are triggered on DOM elements and XPath (XML Path Language) elements are found. Therefore, fewer images are needed here.
| Used Image Name | Image |
|---|---|
| author_created_dpi_96.png |  |
| author_fields_dpi_96.png | 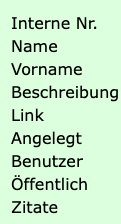 |
| interne_number_dpi_96.png |  |
 1store http://localhost:8102/ "url"
 2open ${url}
 3setWindowSize "1024x768"
 4click linkText=Login
 5type id=user_session_login "first_user"
 6type id=user_session_password "first_password"
 7clickAndWait name=commit
 8click linkText=Autoren
 9clickAndWait xpath=//*[@id=\content\]/form/button
10type id=author_name "Hans"
11clickAndWait name=commit
12visualAssert author_created_dpi_96.png@0.8
13OCRExtractRelative interne_number_dpi_96.png@0.8 "author_1"
14echo First new author id is ${author_1} "darkgreen"
15open ${url}
16open ${url}/authors/${author_1}
17visualAssert author_fields_dpi_96.png@0.8
18click linkText=Autoren
19clickAndWait xpath=//*[@id=\content\]/form/button
20type id=author_name "Hans"
21clickAndWait name=commit
22visualAssert author_created_dpi_96.png@0.8
23OCRExtractRelative interne_number_dpi_96.png@0.8 "author_2"
24echo Second new author id is ${author_2} "darkgreen"
25open ${url}
26open ${url}/authors/${author_2}
27visualAssert author_fields_dpi_96.png@0.8
28click linkText=Logout
The UI.Vision RPA test as a ZIP archive: authors_new.zip
For comparison, here is the original test case from the web application quote. In the Ruby on Rails web framework, the system test is based on Capybara, Selenium and Headless Chromium. When developing in the web framework, the test there is shorter and easier to write. For example, the Author.last method returns the identifier number of the last author entry created and the author_url helper generated in the framework returns the corresponding URL. The test is then also so fast that hardly anything can be seen in the video.
 1# /authors/new
 2test "create two authors with same name" do
 3  new_author_name = 'Hans'
 4  ## login
 5  visit login_url
 6  fill_in 'user_session_login', with: 'first_user'
 7  fill_in 'user_session_password', with: 'first_user_password'
 8  click_on 'Anmelden'
 9  ## create 1st author "Hans"
10  check_page page, new_author_url, "h1", "Autor anlegen"
11  fill_in 'author_name', with: new_author_name
12  click_on 'Speichern'
13  check_page page, author_url(Author.find_by_name(new_author_name)), "h1", "Autor"
14  # it is possible to have two authors with the same name
15  check_page page, new_author_url, "h1", "Autor anlegen"
16  fill_in 'author_name', with: new_author_name
17  click_on 'Speichern'
18  check_page page, author_url(Author.last), "h1", "Autor"
19end